
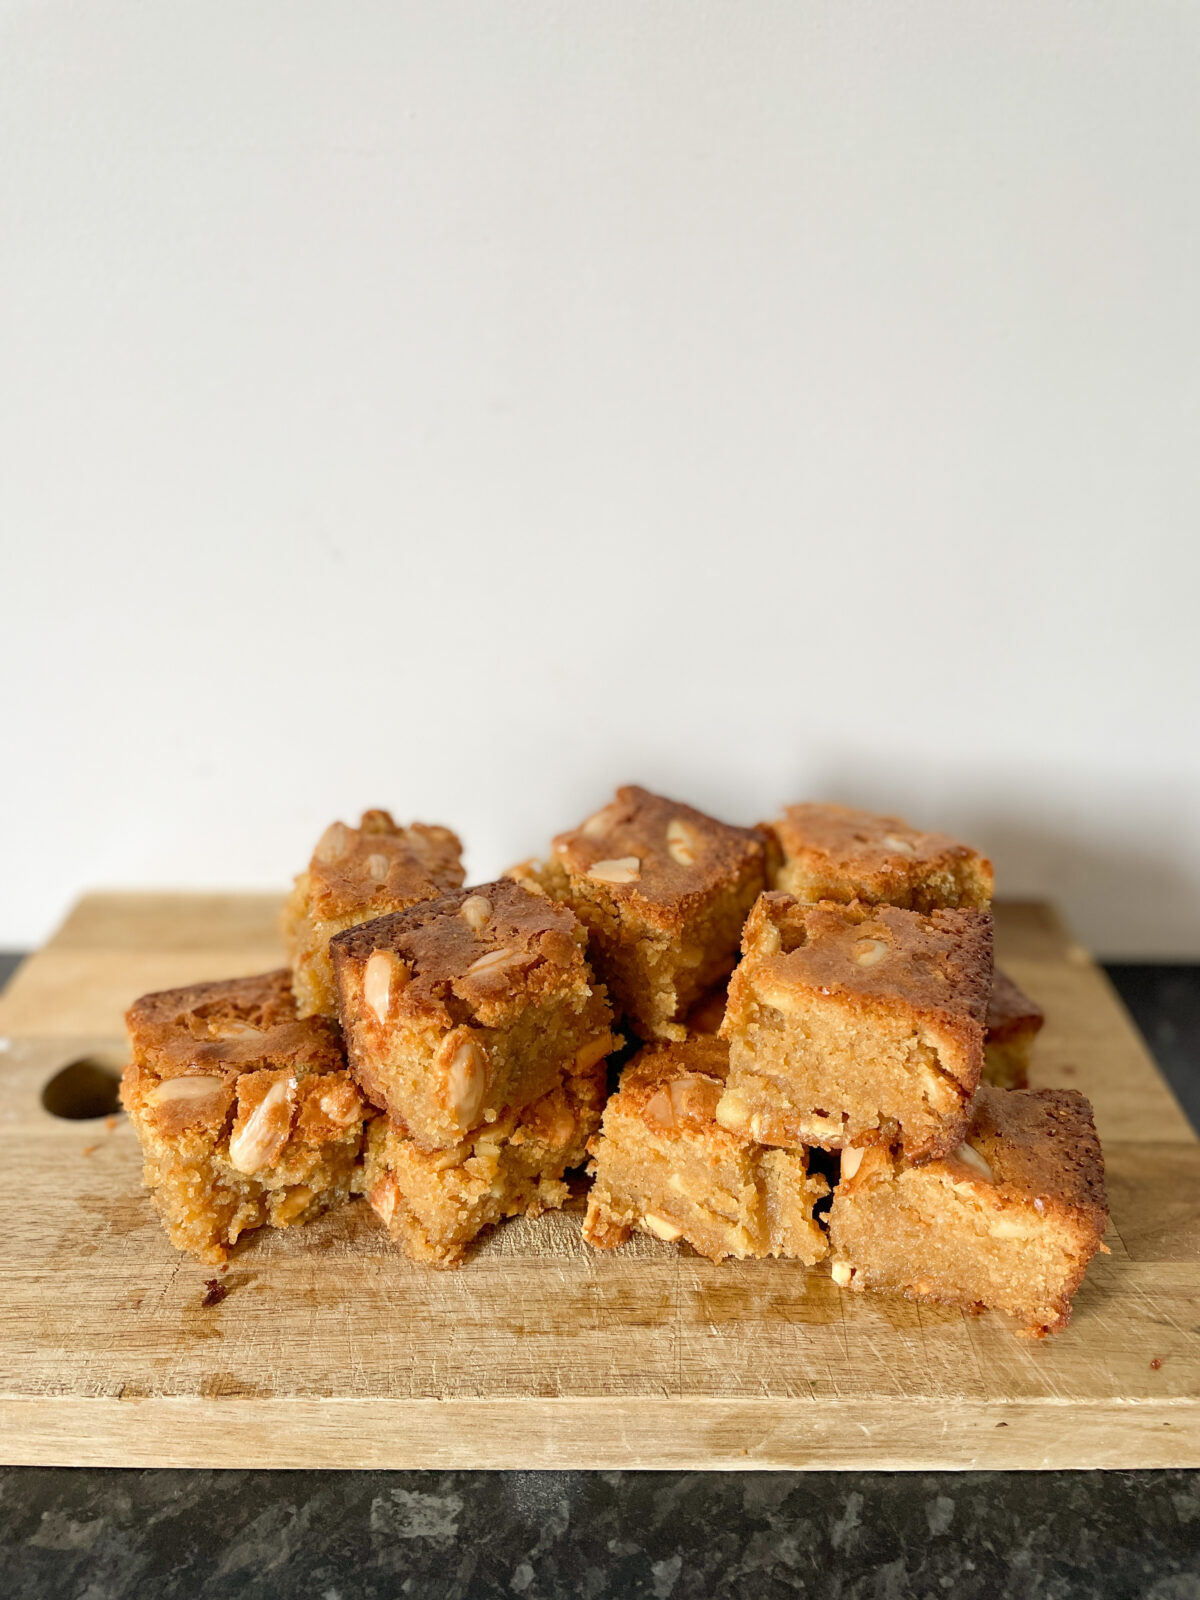
I hope you enjoy my take on this delicious recipe, scrummy served with ice cream as an after dinner dessert or an indulgent snack, these Blondie’s were a hit with my family.
Credit to janespatisserie’s white chocolate blondie recipe for the inspiration. I adapted it and created my yummy white chocolate and almond blondies. She has many blondie variations on her website, I would definitely recommend checking them out.
I’m not a professional baker nor am I an expert, but my goal for 2023 was to bake a birthday cake for all of my family members, I also made my very first 3 tiered wedding cake this year, and that sparked a passion for baking, and the more my confidence grows in the kitchen, the more I want to experiment with recipes and flavours.
These blondies were a real hit in our home, so I had to share how I made them.
Tips & Advice
These blondies were an experiment, I had no idea how they would turn out or if they would even taste good, but in my mind white chocolate and almonds sounded nice together. Don’t be afraid to change up the flavours, switch out the almonds for another nut, or perhaps raspberries?.. That sounds good. My point is if it sounds good to you give it a go. At worst you’ll have a few wasted ingredients.
White chocolate is incredibly sweet, its also quite oily which in my opinion works in the blondie’s favour, as it makes them extra moist and gooey, feel free to add less while chocolate chunks or no chocolate chunks at all, like I said, experiment with what you think sounds nice to you.
Ovens are all different. I never tend to follow cooking guidelines on recipes, because my oven may to work the same as the baker’s. Ive adapted the ‘low and slow’ method for a lot of my bakes, I find its the safest option. Baking at a lower temperature for a longer period of time reduces the risk of an underbaked centre and burnt edges. I don’t have an oven thermometer, so I just play it safe, keep the temperature down and check on my bakes often.
You don’t NEED high quality white chocolate. We are a family on a budget, and I love to bake. So I have to adapt to making cheaper ingredients work. I used Molly’s white chocolate from Tesco and the blondies turned out great. I would imagine it has a higher oil content, but again, I don’t think that’s necessarily a bad thing when you’re aiming for a fudgy texture.
It doesn’t matter if you don’t have a baking dish or tin that’s exactly 7”x10”, the size of your baking dish will just determine how thick your blondies will be. It may alter the way they bale in the oven, which is another reason I like the ‘low and slow’ method.
Serves – 15
Calories – Approximately 364 per serving
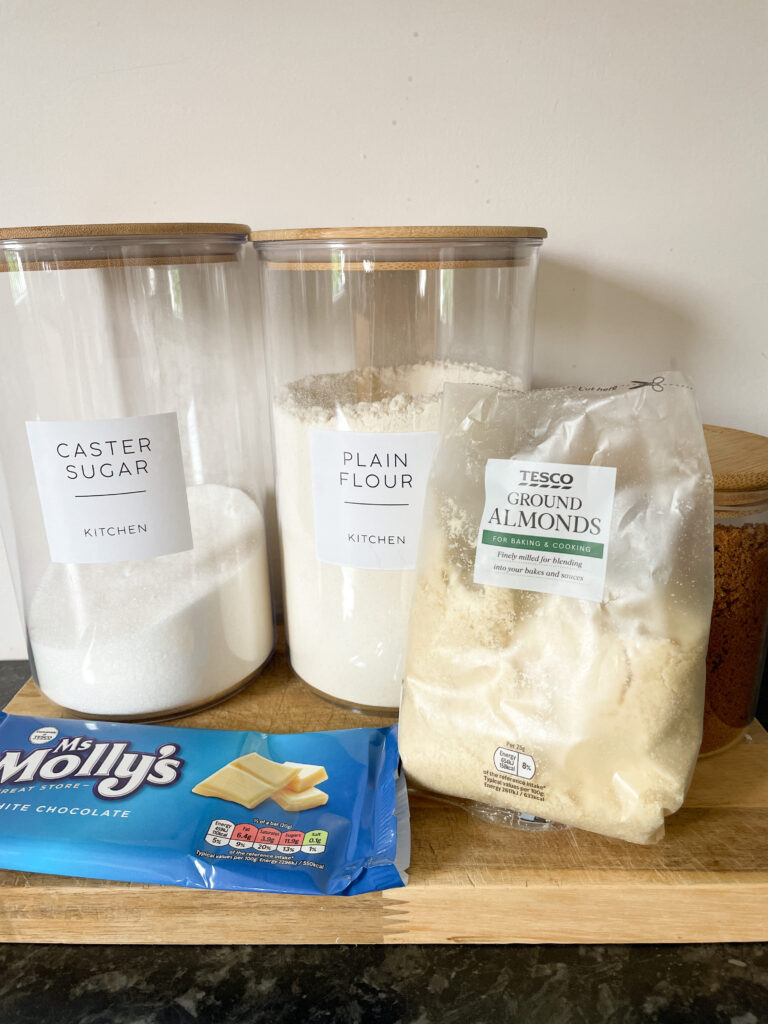
What You’ll Need
7”x10” Baking Dish
325g White Chocolate 1787.5
175g Unsalted Butter 1255
100g Caster Sugar 400
100g Soft Light Brown Sugar 393
3 Eggs 465
90g Plain Flour 328
60g Ground Almonds 347
100g Blanched Almonds 581
Method
1. Preheat your oven to 170/150(fan) degrees celsius.
2. Line your baking dish with grease proof paper.
3. Add your butter and 175g of your white chocolate to a microwavable bowl and melt in the microwave in 10-20 second bursts, stirring in between so it doesn’t burn.
4. Add your sugars to the melted mixture and combine.
5. Add the eggs and combine.
6. Mix in the plain flour and ground almonds.
7. Chop up the remaining white chocolate and half of the almonds, add to the mixture and combine.
8. Pour the mixture into your baking dish, scatter the remainder of the almonds on top.
9. Bake in the oven for 45-60 minutes (I check on them at 30 minutes then every 10) or until the edges are slightly crispy, the top is nice and golden and its just stopped wobbling.
10. Allow to cool completely before cutting, for extra clean slices, once cooled pop the uncut blondies in the fridge for an hour.
11. Cut into 15 pieces.
12. Serve and enjoy!
I hope you enjoy this recipe. If you give it a go or you made your own creation, be sure to tag me on Instagram – @mummyandavery